

GET STARTED WITH
SABER & ACCESSORIES
APP COMPANION
THE PACKAGE
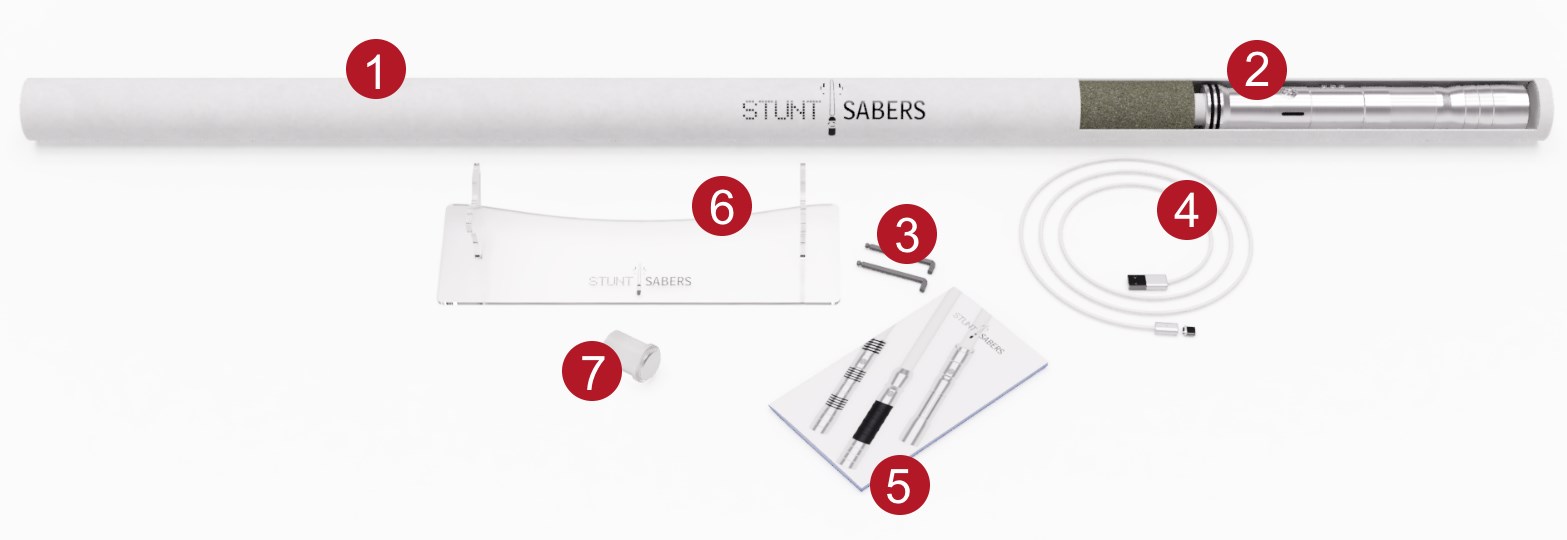
Your saber 2 comes safely packed in a cardboard tube filled with foam padding 1. To open the tube remove the right cap and just slide your saber out! The other cap is permanently attached and should not be taken out. The saber comes with a bunch of items - allen key 3 for the blade locking screw with a spare, a USB type C cable 4 - either regular (standard) or magnetic version (optional) - and a manual 5 which will explain the basics of safe and effective use of your saber. Optionally if you so chose will come an acrylic base stand 6 to assemble for your saber and a blade plug 7 which comes in handy when you need to take the blade out and still want to show your saber off.
THE STAND
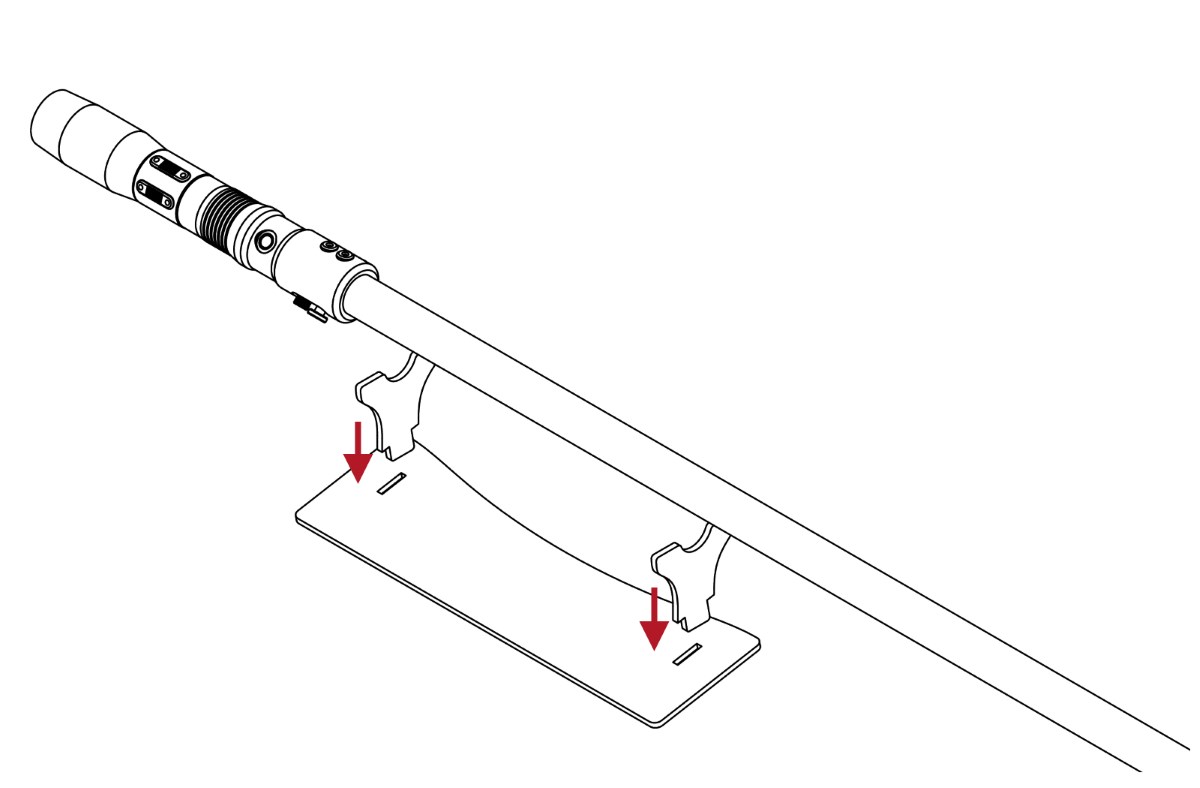
The acrylic stand is very easy to assemble - just insert the two holders into the base as shown in picture above and voila - it is ready. The holders should go in with a bit of resistance so that they don’t just fall out. The sabers is intended to be placed on it with the blade, keeping the handle close to the stand to keep it balanced.
THE PLUG
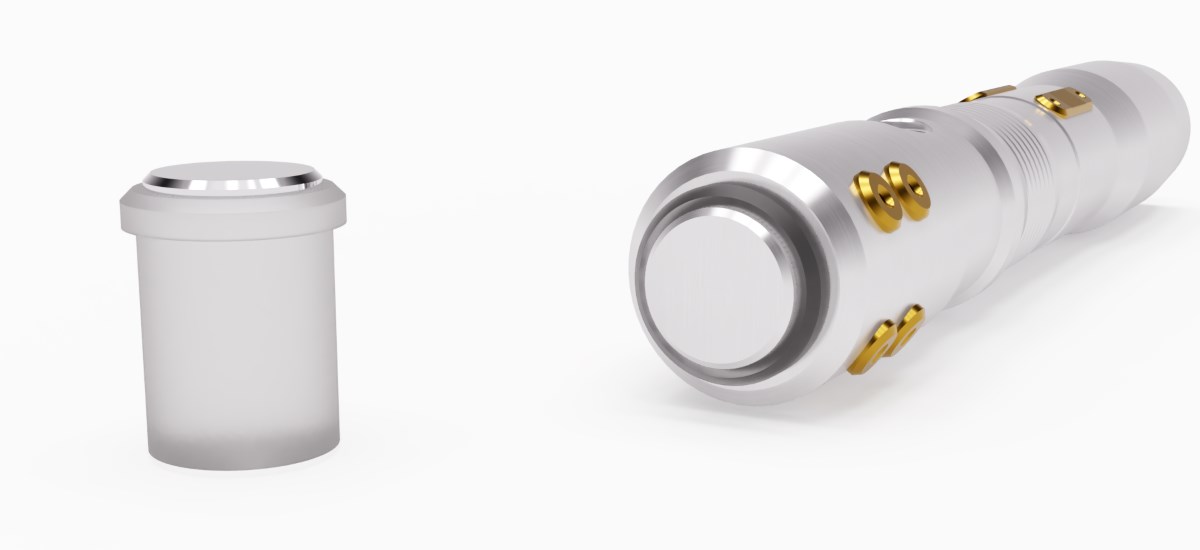
If you ever want to take the blade out, it is best to have a plug on hand. Not only will it look nice, but it will also protect you from the very bright LED inside the saber. Remember to also put the round cap that comes with it on the blade you just took out - to keep the insides clean from any dust or debris.
GET CONNECTED
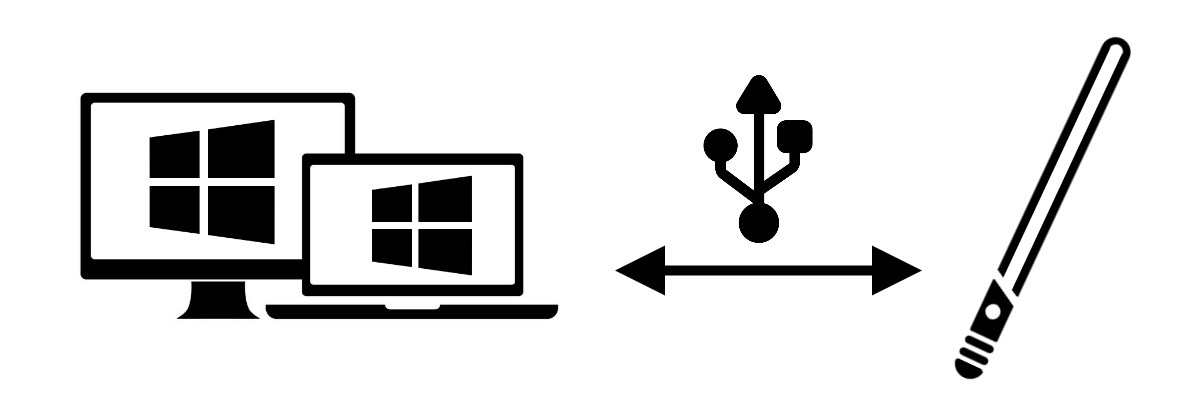
Each saber comes with a state-of-the-art custom designed controller which allows you to fine-tune your saber’s behaviour to the smallest detail. First step, however, is to connect your device to a PC. It should work on virtually all machines with Windows 7, 8, 8,1 and 10.
Each saber has a USB type C port on its end. Make sure that the plug is all the way in in your saber - the connector housing should touch the bottom cap. Connect the other end of the cable to your PC. With that done and the application launched, simply turn the saber on and it will automatically connect. If you are using a magnetic cable keep in mind that it can charge the saber in any orientation, however data transfer is only possible in one. Thus, if the application doesn’t connect to the saber, try changing the orientation of the plug in saber and it should connect then.
GET TO KNOW THE APP
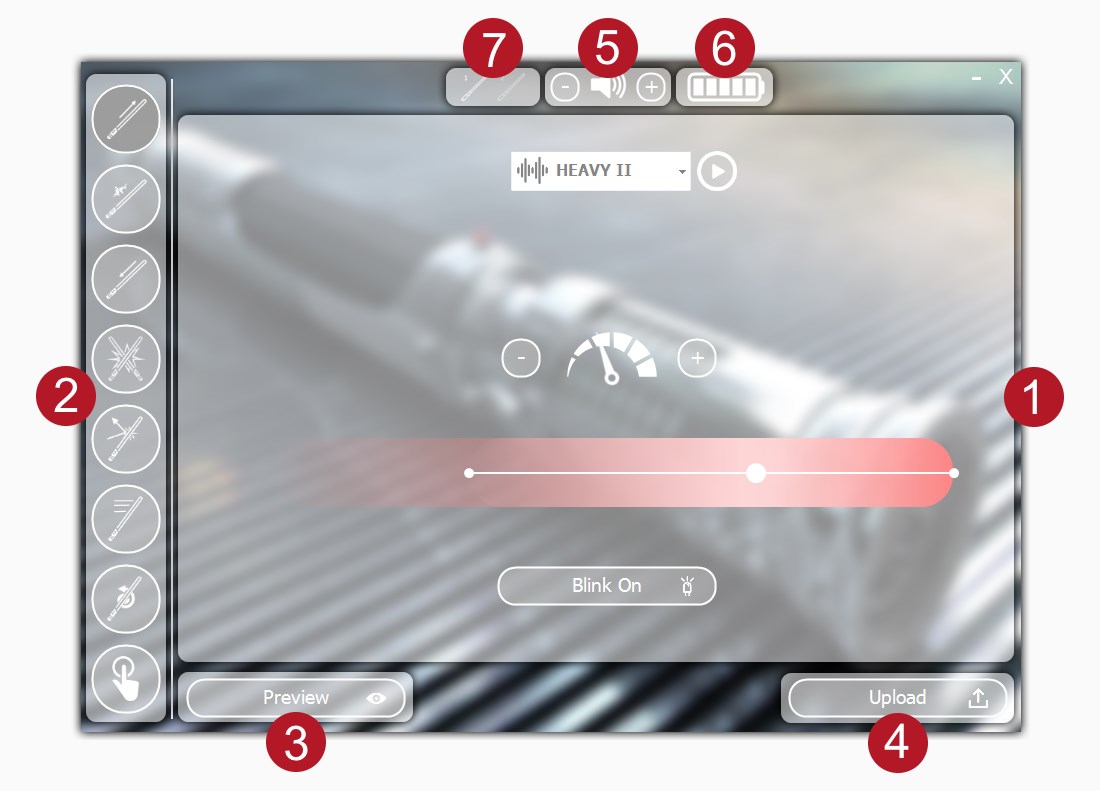
The application screen is divided into a couple important sections. The most interesting, of course, is the one which allows you to adjust the settings of your saber and it occupies most of the screen 1. The bar on the left 2 is the navigation bar which allows to select which part of the saber behaviour you are currently changing. Almost all changes can be previewed live on your saber, by using the preview button 3. Once you are sure you want to actually use the new setting, just press upload 4 and the changes will be written to the saber. Otherwise the next time you turn it on it will still use the old settings.
With the most important part described, what remains is the upper information bar which shows you the volume level 5, battery level 6 and which preset is currently selected. You can swap the presets from the application by just clicking on the greyed out saber icon and your saber will automatically reset and run the second preset.
DOUBLE PRESET - WHAT IS IT?
Double preset is one of the most interesting features in a StuntSaber. It allows your saber to carry two absolutely independent sets of settings, both available immediately at the push of a button. With the option enabled, the first preset is activated with a short button press, while the second requires a slightly longer one.
SABER STARTUP
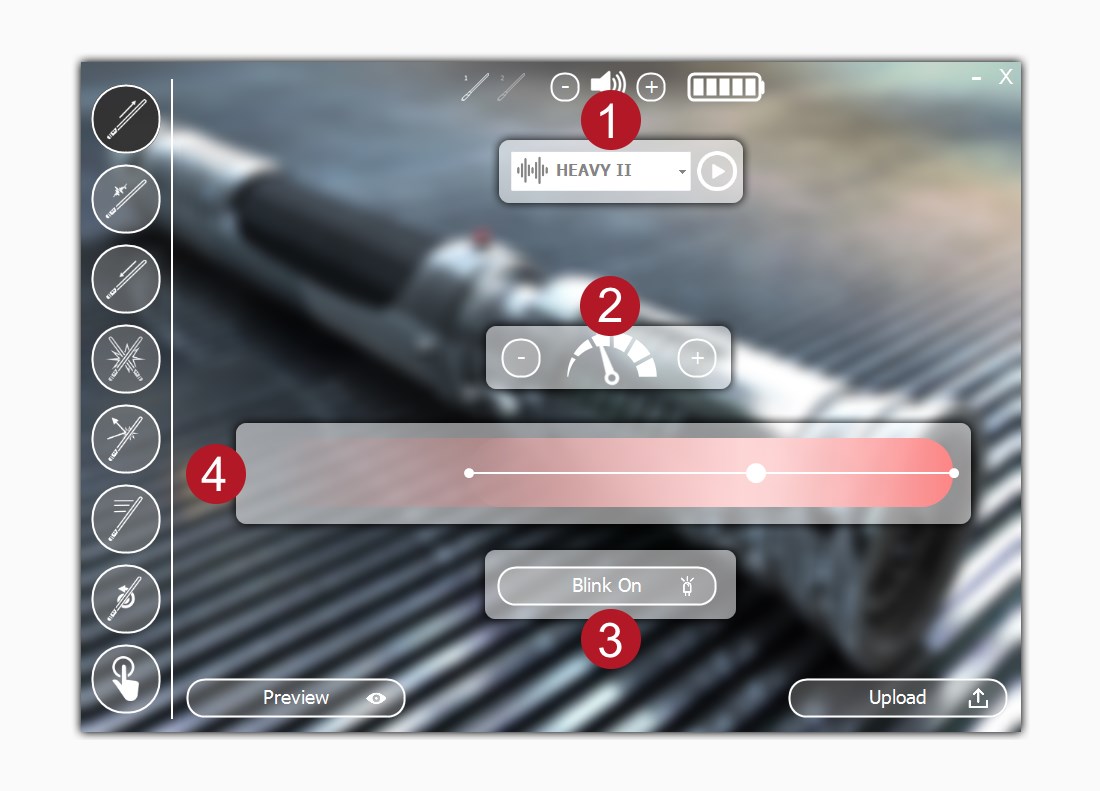
Turning the saber on and off is something you will be doing very often and both of these actions have the same customisable features. Obviously, you can select one from the many sounds 1 from the selection box. It is also possible to specify the speed of the fade effect ranging from very slow to instantaneous 2. That’s not the end though - there is one more feature to go. With the blink on button 3 you can enable a white blink which can nicely enhance the whole sequence. Once activated, a white line with three dots will appear on the colour bar 4. You can drag each of those points around to get the exact timing you want.
BLADE COLOUR - STATIC
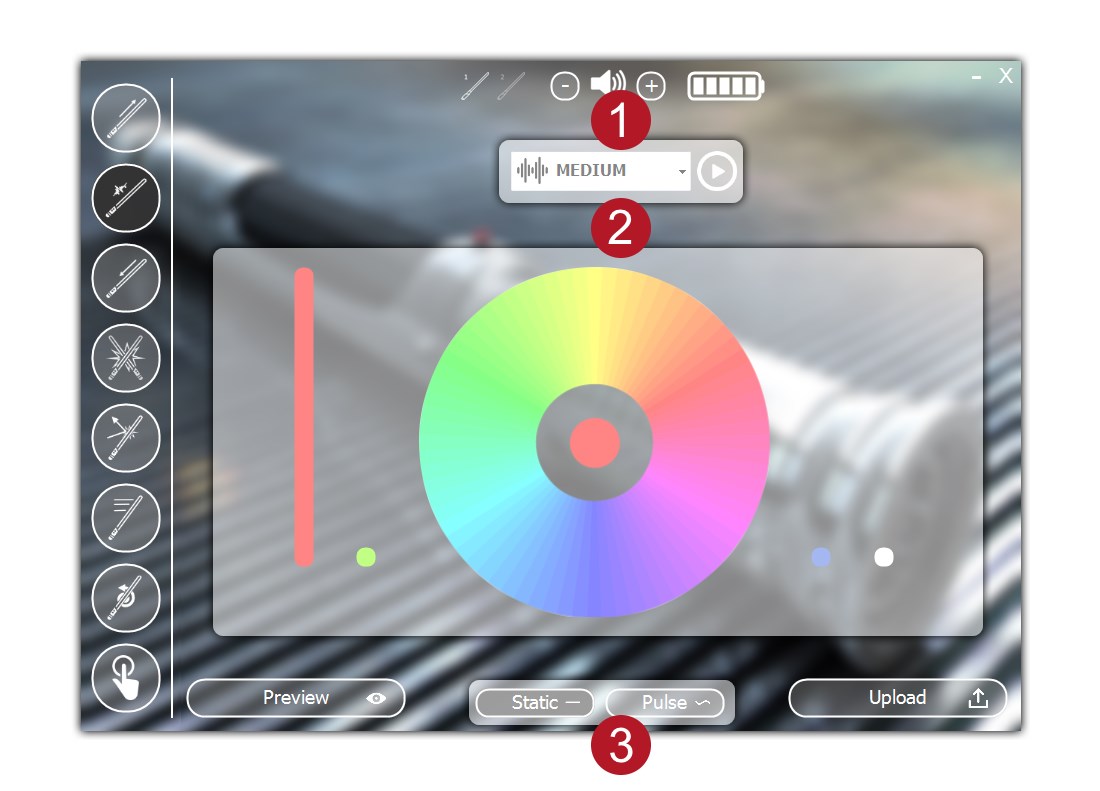
Nothing is easier than selecting your blade colour - just click and/or drag the cursor on the colourful circle 2 and watch the colour of your blade change immediately. If you so prefer, you can adjust each colour bar by just dragging it up and down - this is especially handy when you want to use the white LED. The sound selection here 1 allows you to select the hum which plays continuously while the saber is on - a very important choice!
Last but not least come the inconspicuous buttons in the lower middle 3. With them you can switch whether you want your blade to have a static blade colour or a pulsing effect which allows your saber to constantly change colours to your specification. More on that later.
BLADE COLOUR - PULSE
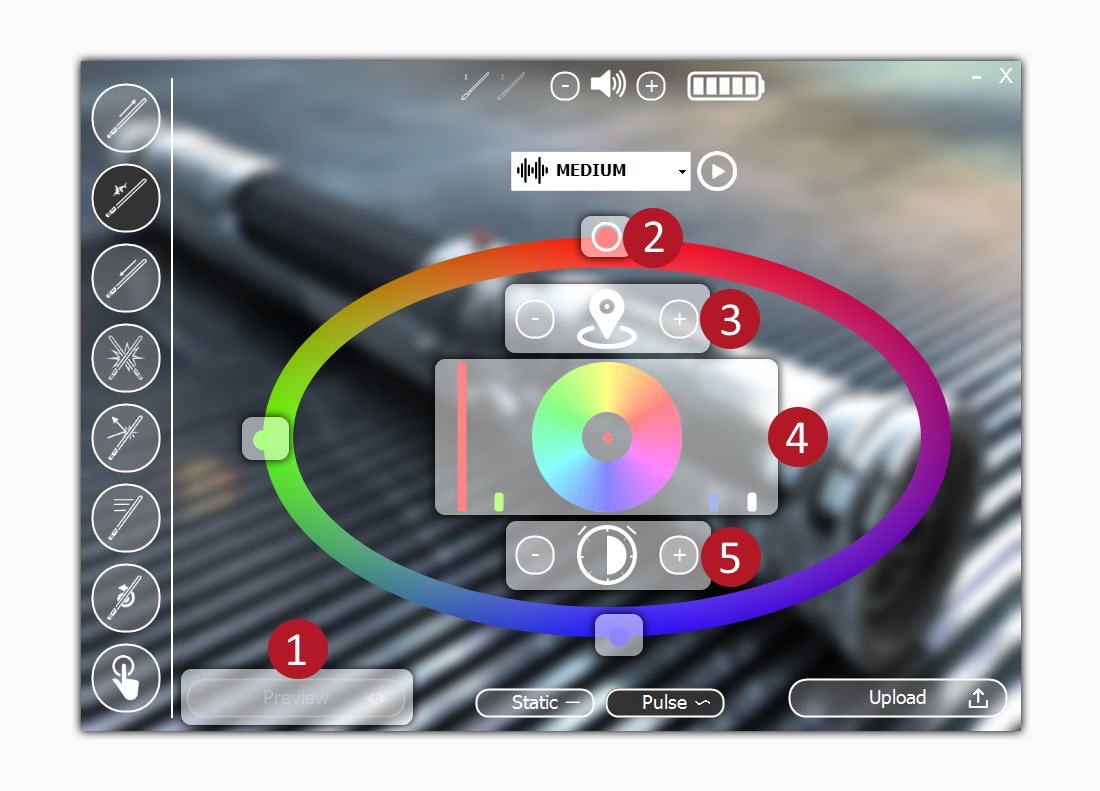
The pulse tab lets you really go to town with your blade colour. While in this mode you cannot preview the changes 1 in real time, just use the upload button and experiment this way. The main event here is the elliptical loop which represents the blade colour in time. It is defined by waypoints 2 that you can add or delete with the upper buttons 3, drag around to get different transition times between each of them. To change the colour at a specified point just select it with your mouse and use the colour wheel 4 just like you would with a static colour. The whole pulse duration is displayed on the clock icon 5 (hover over it to see time in seconds).
Keep in mind that you don’t need to change your saber into a disco ball - although you certainly can. There are more subtle uses, like designing a one colour breathing effect etc.
CLASH
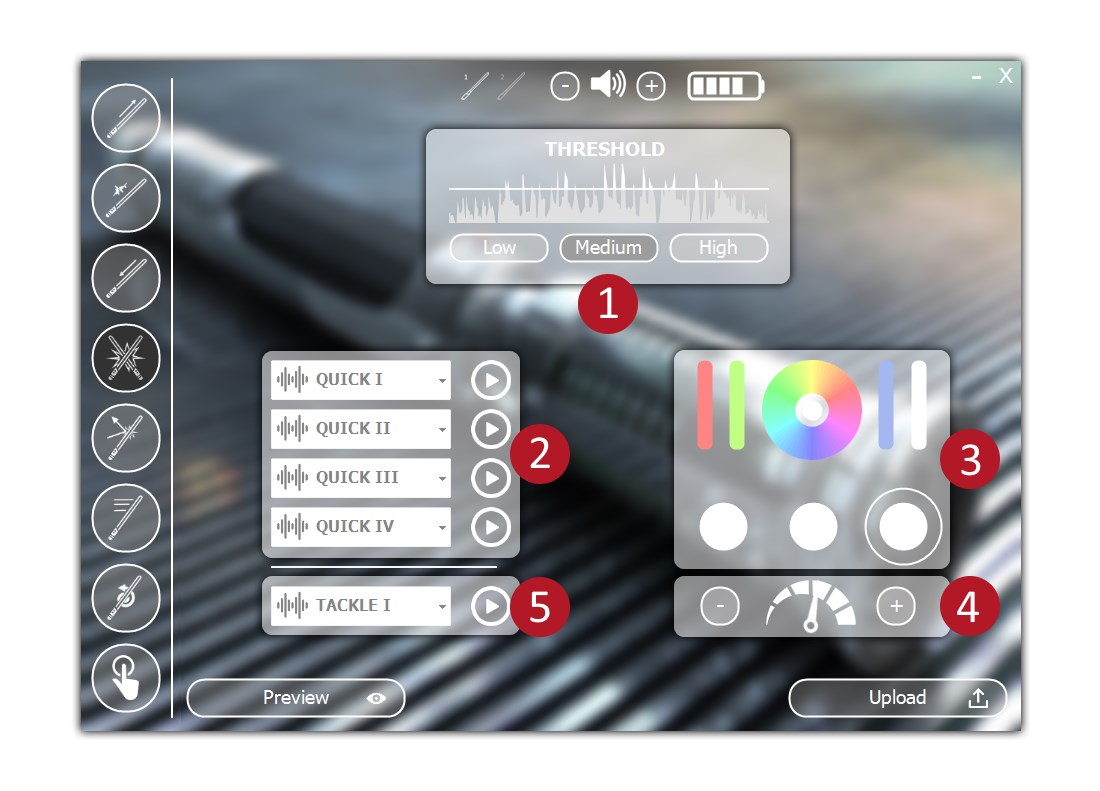
Here comes another important part of your saber settings - how it behaves when it hits something. First thing to set is the sensitivity 1. It is an important setting especially for faster and more advanced tricks - you’ll want to set it on high to avoid false positive clashes when you spin really fast. You can select 4 sounds 2 that will be randomly played when the clash is activated. Furthermore, the blade will flash 3 times in the colours you can individually specify 3 with the speed you chose 4. The last, fifth sound selection 5 is for the tackle special action - that’s the one you activate manually with the saber button.
DEFLECT
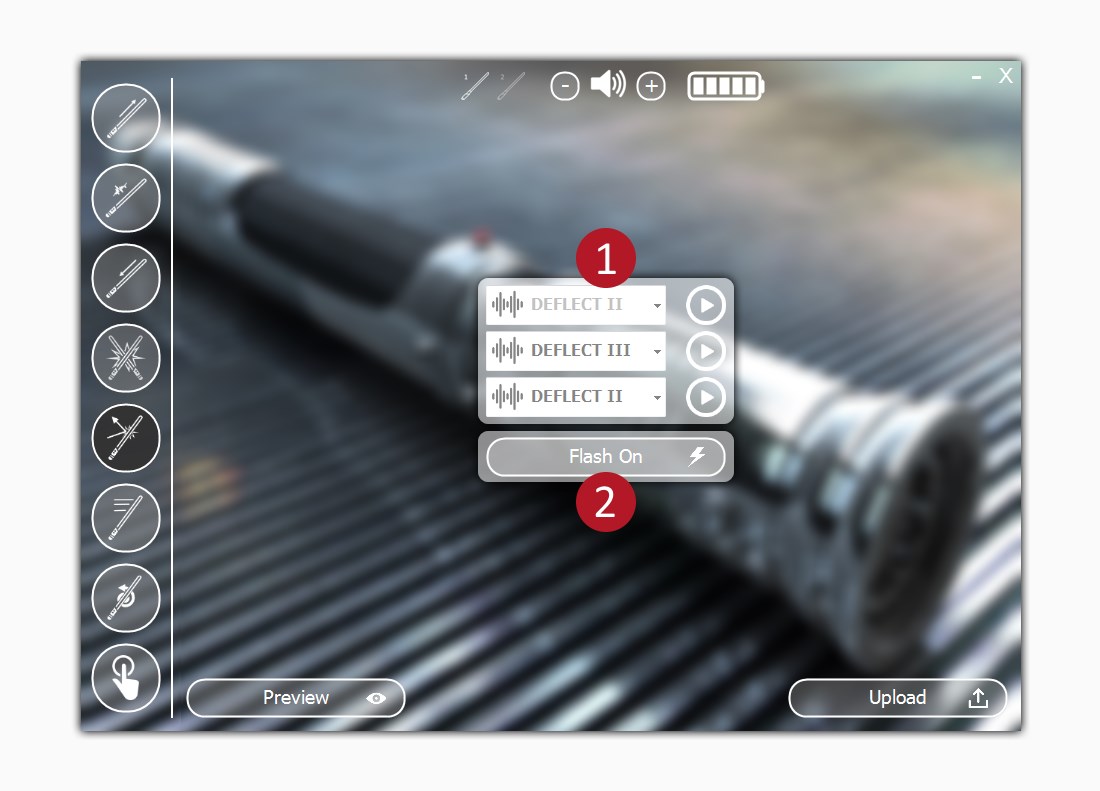
This tab allows you to set the sounds 1 that will play with the special deflect action - activated with saber’s button. You can also specify whether the saber should flash 2 - if so it will use the flash pattern specified in the previous tab.
SWING
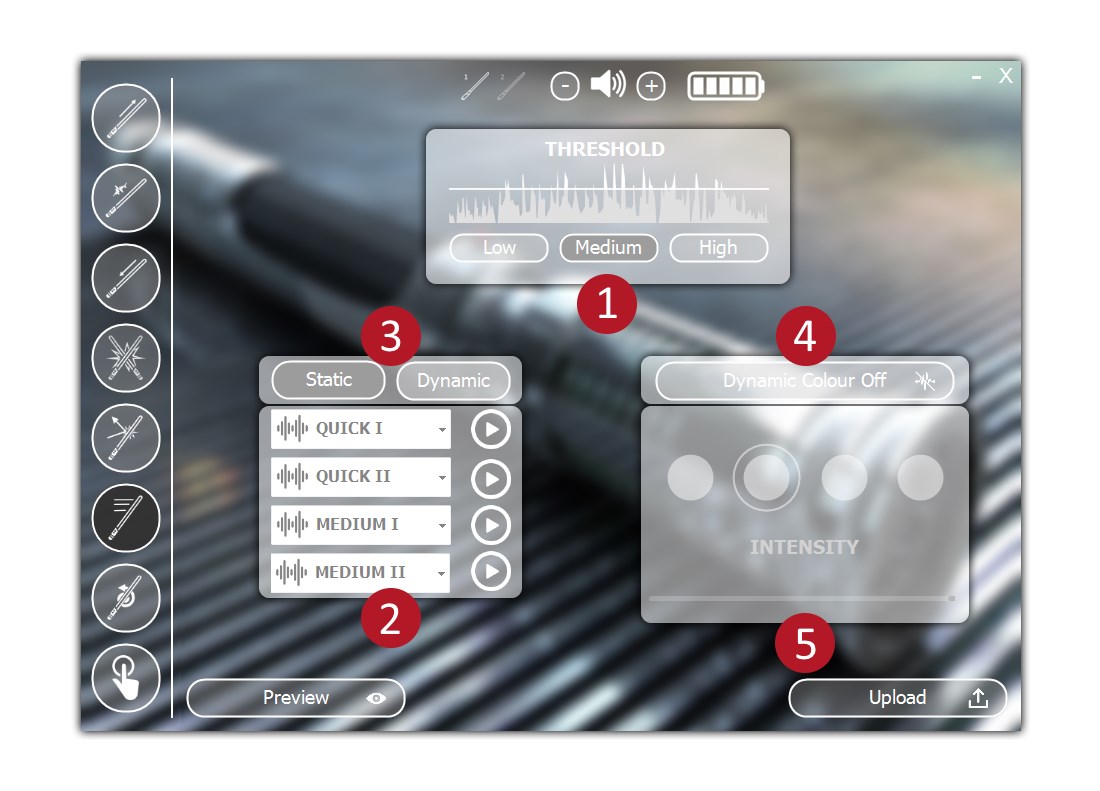
Just as with clashes, here too can you specify the sensitivity of your saber 1. Also as usual there are sounds to select 2 which will play on swing detection. The static/dynamic selection 3 switches between the prerecorded sounds mode (static) and dynamically generated ones (dynamic). With dynamic option enable the sensitivity no longer applies - the saber will react to any and all of its movements. You can then select the tune value which works best if you experiment a bit with it.
There is one more rather unorthodox feature here - the dynamic blade colour 4. It only works with a static blade colour selected and allows you to choose one of the four main colours - red, green, blue and white 5 that will light up more the harder you swing your blade. For example if you have your blade set to red and activate dynamic colour with green, when you swing the saber its blade colour will go from red to orange, depending on how hard you do it. Do check it out - you might like it.
WHIRL
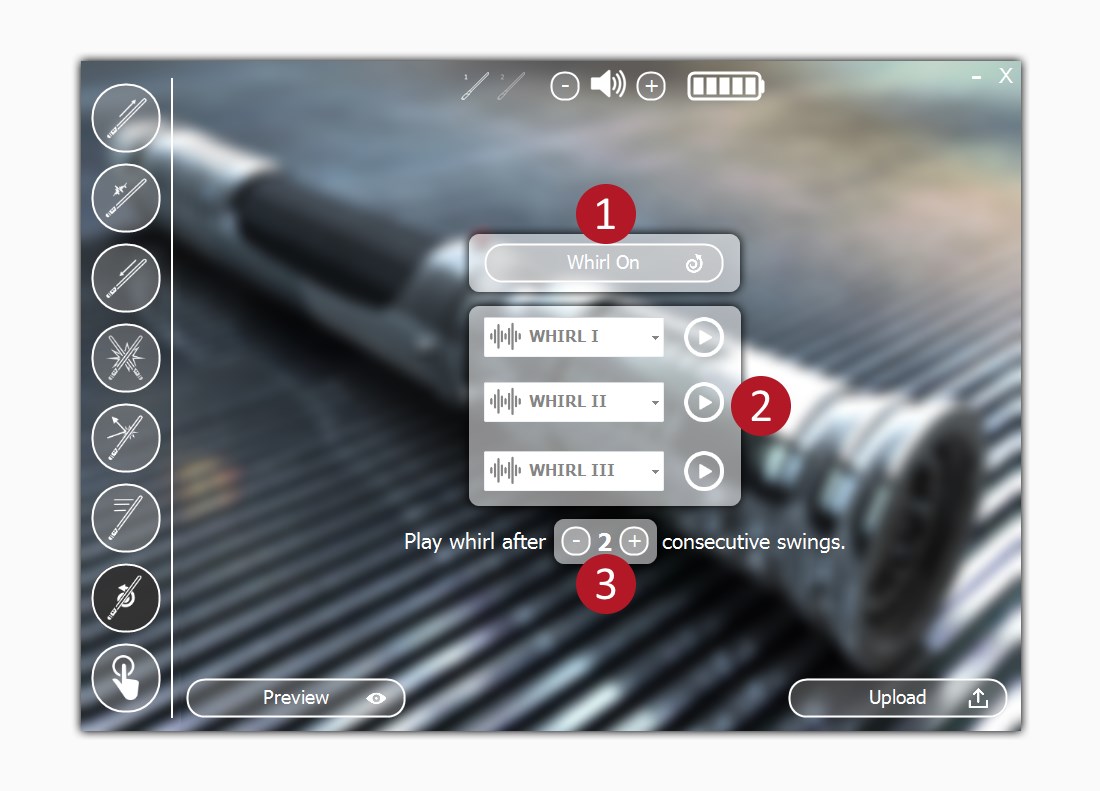
If you have static sounds selected, there is one additional tab that will be of interest to you - here you can enable the whirl action 1 which will play different sounds 2 when the saber detects continuous move. You can specify how many swings need to be performed before the sound changes. Each time you stop moving it will reset and normal swing sounds will be played.
THE BUTTON

Last but not least is the button tab. Here you can select the method of turning the saber off 1 to best fit your needs. The second section is responsible for special actions 2 - tackle (simulating two sabers in contact) and deflect (simulating bolt deflection). Keep in mind that they are sometimes mutually exclusive - if you want to activate the deflect action you will have to switch the turn off to long press.
You’ve definitely noticed that your saber button is illuminated. Here you can select when you want it to be 3 - from always turned off to always on, even when the saber is turned off. This will drain the battery slowly but does look very cool. The last piece of settings refers to the double preset feature 4. I don’t know why you would want to do that but hey - the option is here.